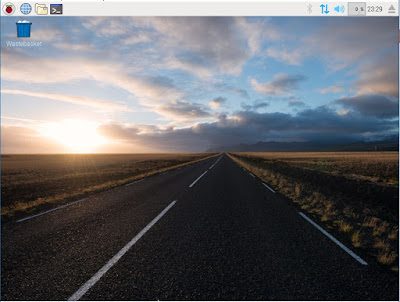
The PIXEL ISO (Debian+PIXEL for Intel x86 CPUs) will boot if you copy the ISO to your E2B drive. It is designed to run on old, low-spec systems and be easy to use.
However, to be able to use the persistence option, you need to create a pixel-rw ext4 file and then create a persistence.conf file within it.
Here is the .mnu file for it.
# Place this .mnu file and the Debian Pixel x86 Live ISO in (_ISO\xxx\MNU), e.g. \_ISO\MAINMENU\MNU or \_ISO\LINUX\MNU
# IMPORTANT: you MUST run WinContig (Ctrl+F2) before booting E2B.
# http://downloads.raspberrypi.org/pixel_x86/images/
# For persistence: (File Name=pixel-rw Volume Name=persistence)
# 1. Click 'Create ext2/3/4 FS' in RMPrepUSB
# 2. Set the FILENAME to: pixel-rw
# 3. Set the VOLUME LABEL to: persistence <------ VERY IMPORTANT
# 4. Set amount of space you would like for persistence and use ext4 for the filesystem
# The persistence 'volume' needs a persistence.conf file added
# Boot to linux and then type following 6 lines in the terminal console
# sudo mkdir /mnt/usb
# ls /dev/ (to see which is the USB device 3rd ptn - it will always be sd(something)3 - try also sudo fdisk -l)
# sudo mount /dev/sdb3 /mnt/usb
# sudo chown pi /mnt/usb
# echo "/ union" > /mnt/usb/persistence.conf or try sudo bash -c "echo '/ union' > /mnt/usb/persistence.conf"
# umount /mnt/usb
# now reboot and use the persistence menu entry (or just press ENTER)
iftitle [if exist $HOME$/2016-12-13-pixel-x86-jessie.iso] rPi Pixel PERSISTENT\n Boot using .mnu file with persistence
set ISO=$HOME$/2016-12-13-pixel-x86-jessie.iso
set PF=/pixel-rw
if "%E2BDEV%"=="" set E2BDEV=hd0 && pause E2BDEV forced to hd0!
if exist CD echo WARNING: Cannot use partnew command! && pause && configfile (bd)/menu.lst
#enable parttype output
debug 1
# make empty table entry in 3rd position in ptn table
parttype (%E2BDEV%,2) | set check=
debug off
set check=%check:~-5,4%
if "%check%"=="0x00" partnew (%E2BDEV%,2) 0 0 0
if not "%check%"=="0x00" echo WARNING: PTN TABLE 3 IS ALREADY IN USE - PERSISTENCE MAY NOT WORK! && pause
debug 1
if not exist %PF% echo WARNING: %PF% persistence file not found! && pause
errorcheck off
if "%check%"=="0x00" partnew (%E2BDEV%,2) 0x0 %PF%
errorcheck on
#map ptn 4 to ISO
partnew (%E2BDEV%,3) 0x0 %ISO%
map %ISO% (0xff)
map --hook
root (0xff)
chainloader (0xff)
boot
The .mnu file will be included in the \_ISO\docs\Sample mnu Files\linux folder in E2B v1.88.
Tip: To check that persistence is enabled, type df in the terminal window and check that the /dev/sdX3 partition is mounted as /lib/live/mount/persistence/sdX3.
You can also try ScrollLock key to pause the boot messages, or use dmesg | less and the SpaceBar to view the boot messages afterwards.
| Persistence should be working if the /dev/sdX3 partition is mounted. |
No comments:
Post a Comment